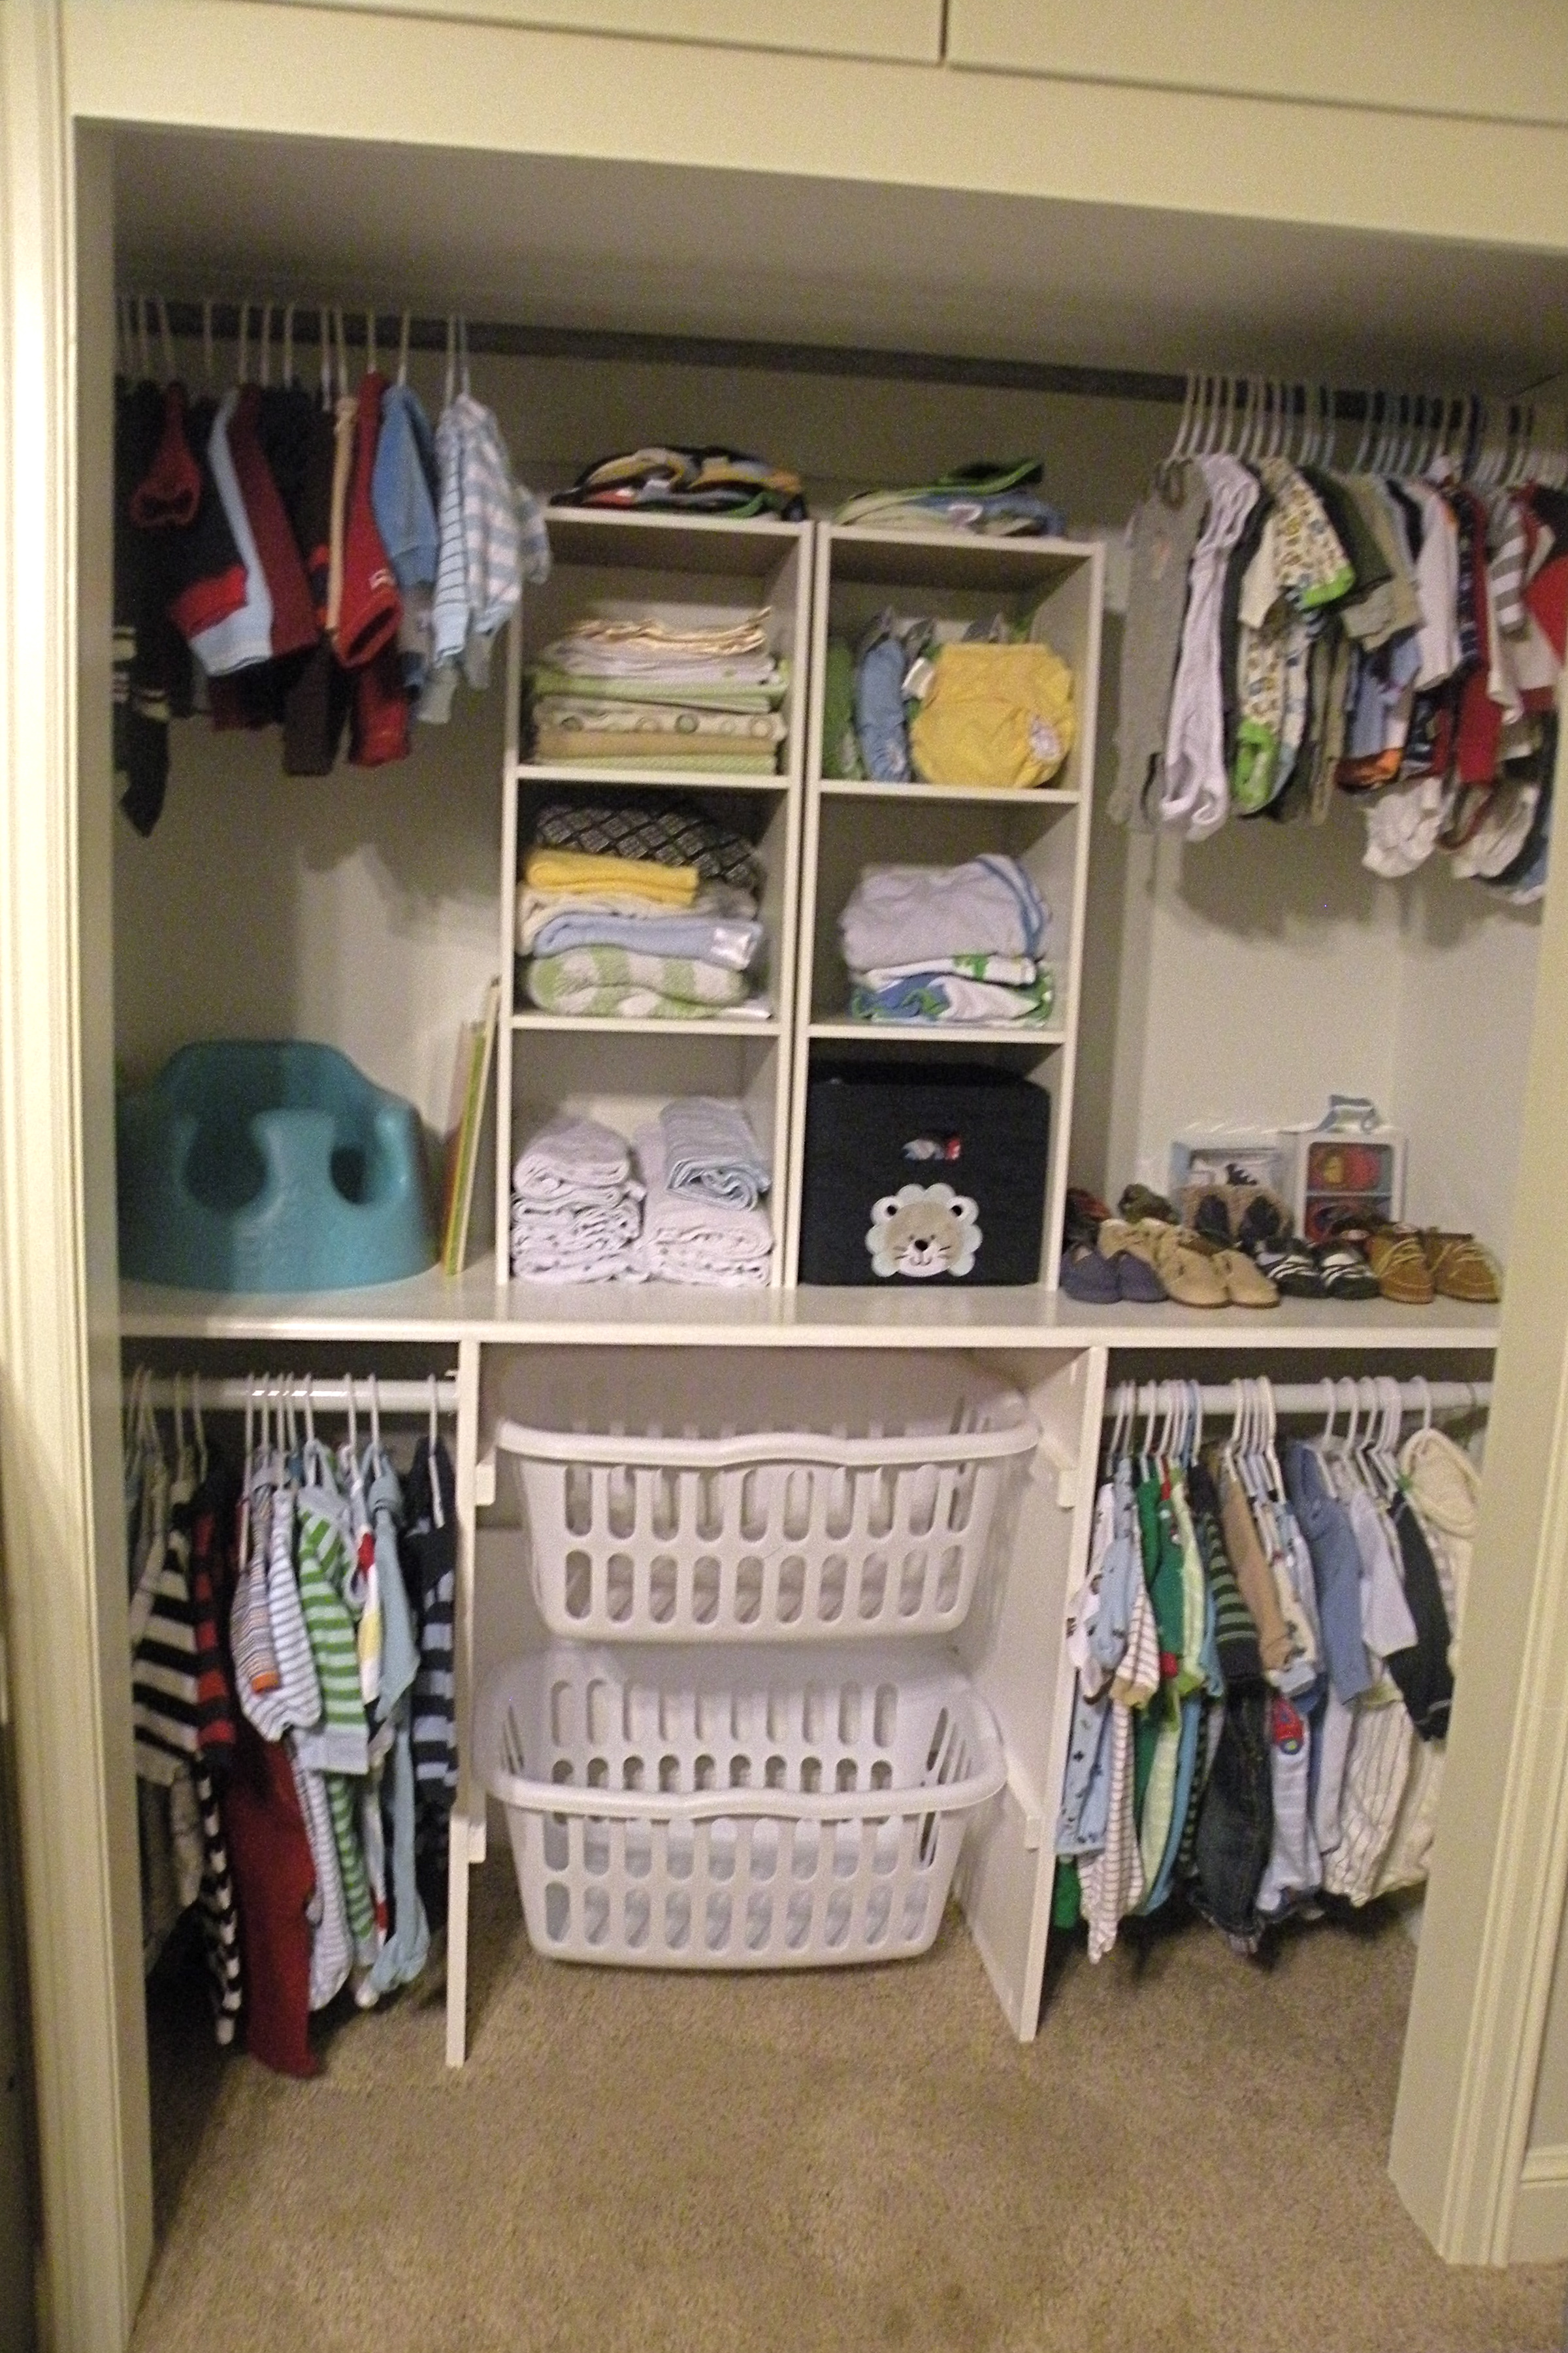
We’ve had a lot of interest in the baby closet with several friends asking how we did it. So by popular demand, here it is!
The best part about this closet is that it is really incredibly easy. We did this long before I had used Erin’s Pinterest Project wish-list as an excuse to build up my wood shop (Thank you, Pinterest). The entire process is as simple as cutting a few pieces of wood and screwing them together.
Here’s what you’ll need:
- Drill with screwdriver bit
- 1 x 2 lumber
- 1/2″ plywood
- 1×8 poplar
- 1 5/8″ wood screws
- 2 small laundry baskets
- 2 Closet Maid 3 Cube Stackable Organizers (These can be found at Target)
- Closet Rods
- Circular Saw or Jig Saw (You don’t have to cut the boards yourself if you don’t have access to a powered saw. You can have the people at the lumber yard where you buy your material cut everything to size. Just give them the cut list and they will take care of this part)
- Although you don’t have to have one; you can also use a Kregg pocket hole jig which can be found at any major hardware store. They go for around $50 and are great for this project as well as any other where you don’t want the screws to be seen. I would definitely recommend this investment.

Step 1:
Decide how high you will need and/or want the main shelf to be. This will need to be tall enough to fit the racks for your laundry baskets below. Measure the width and depth of the closet. (As a reference, our closet was 5 feet wide by 3 feet deep and we set our main shelf 3 feet high.)
Step 2:
Get one piece of !/2″ plywood cut to fit the width and depth of the closet and act as your main shelf. Have 2 pieces of the same plywood cut to match the depth of your main shelf and tall enough to fit squarely below the main shelf and hold your laundry baskets.
Have 4 pieces of the 1×2 lumber cut to match the depth of the main shelf and act as your cleats for your laundry baskets, 1 piece of 1×2 to be 2 inches shorter than the width of the closet. Have 1 piece of 1×8 poplar cut to match the width of the laundry basket rack and 2 pieces of 1×8 cut to match your closet depth.
Step 3:
Attach the 1×8 poplar boards along the side walls of the closet by screwing them to the wall studs. Also attach the 1×2 popular you had cut 2 inches shorter than the closet width along the back so that the tops of all of the cleats are even and level.
Step 4:
Attach the 1/2″ plywood you cut for your main shelf on top of these cleats with wood screws.
Step 5:
Now if you have the Kregg Pocket Hole Jig, use it to drill 2 pocket holes on each end of the 1×8 Popular you had cut to the width of your basket rack. (If you don’t have the jig, you can just screw through sides to attach this board.
Also, drill 4 to 5 pocket holes along the top edge of the plywood you had cut to act as the sides of your basket rack.
Step 6:
Attach the 1×2’s to the sides of your basket rack to that you have enough space from top to bottom to allow for both laundry baskets.
Step 7:
Attach the 1×8 popular along the back side of the basket racks and attach the walls of the basket racks to the underside of the main shelf. The 1×8 board acts as a stiffener to hold the sides of your basket racks together.

Step 8:
Install your closet rods from the side of the basket racks to the 1×8 poplar cleats on the sides of your closet. (This is why you will want to have 1×8’s as the side cleats instead of just 1×2’s. 1×8’s give you more space to mount your closet rods.

Step 9:
Paint the shelves to the color of your choice. We chose white to match the 2 Closet Maid Stackable Shelves we used.
And that’s all there is to it. If you get the wood pre-cut at your local Lowes or Home Depot, you can do this little project in one easy afternoon. The best part about using the Closet maid shelves is that you can move them around to fit your needs and as the baby changes and grows, this becomes very handy.

A few tips:
Make sure your closet is square and the width/depth is even all around. When we first cut our plywood main shelf, we didn’t know the closet wasn’t exactly square so one corner was slightly shorter than the rest. Because of this we had to cut the main shelf a couple of times to get the right fit. If it’s not square, no problem, just cut the main shelf to fit the smaller measurement. It’s better to cut the main shelf a !/2″ short on the width to allow for some wiggle room. You can always caulk the gaps around the edges after you have it installed.
When you measure the widths of your laundry baskets, allow for the basket rack to be a about 1/4″ wider so the baskets will slide in and out easily.
I hope that helps all of you out there who are either expecting a little one or just want to make their closet a little bit more kid friendly. If you have any questions, feel free to ask.

Pingback: Room for Baby | Around the Farmhouse Table
Laundry bins – brilliant!
Jay {at} Purple Eggplant
Thank you, thank you, thank you, for posting your how to! i want to do this for my kids closet and have been looking everywhere on how to’s. i had my own plans drawn out just from a pinterest photo then i found your link… saved me a lot of mistakes =)
Glad we could help!
I love this! We are moving into a new home with empty closets and I am planning on installing some laundry shelving like this. It makes a huge difference!! A question if you are able…. How do you install the closet rods from the side of the wood to the side of the closet? I’m lost there. Thank you for a great post!
Congrats on the new home! We bought closet rods that screwed directly into the cleats (the 1×4 boards that held up the shelf) . We had a little trouble maneuvering, but found a good angle and it all worked out.
Love it I am thinking about possibly doing this for my 6 yr old and 2 1/2 yr olds room closet in our new apartment. That way I do not have to purchase a new dresser which takes up space.
Thanks for thr how-to! Where did you get the baskets? Or do you know the sizes?
Hey Jen, I believe we bought the baskets at Target. We purchased those first so I could build the racks specifically for that size.
Hey Jen, I believe we got the baskets at Target. We purchased those first so I could build the racks specifically for those sized bins.
Hello – Thanks for the great idea. A little confused about step 3.. if I understand correctly, I need (2) 1×8 poplar boards measured the depth of the closet and attach them on each end of the closet ( screwed into the studs) set to the height of the main shelf. Then do I attach a 1×2 on the back wall spanning the length of the end wall to the laundry basket wall? Just need some clarity, thanks 🙂
Hi Dave. You are correct. The 1×2 across the back acts as a support for the backside of the shelf. You really only need it to run up to the sides of the laundry basket walls for sufficient support for the shelf.
Pingback: Baby Closet: How to – toptrendpin.club
Pingback: DIY 20 Wahnsinnig geniale Möglichkeiten, Babykleidung zu organisieren - DIY BLOG
Pingback: Baby Closet: How to | 1000 – Modern
Pingback: Baby Closet: How to – baby organization